패키지 구조를 만들고 샘플 코드를 작성합니다.
1. 설정 환경
- 언어 : Kotlin
- Spring Boot Version : 2.7.3
- 빌드 : Gradle
- IDS : IntelliJ IDEA
2. 패키지 구조
여기서는 패키지 구조를 아래와 같이 잡았습니다.

- api : controller 코드가 위치하는 곳입니다.
- common : 공통 코드를 모아놓습니다.
- service : 서비스 레이어 코드 패키지입니다.
위 구조에 임시로 사용할 샘플 코드를 추가해봤습니다. 이 프로젝트에서는 아래와 같은 규칙으로 패키지와 파일을 생성합니다.
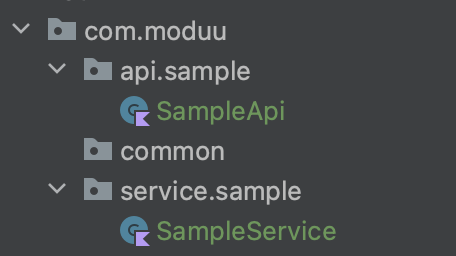
- api/{api이름 패키지}/{api명}
- service/{service이름 패키지}/{service명}
SampleApi 코드
package com.moduu.api.sample

import com.moduu.service.sample.SampleService
import org.springframework.web.bind.annotation.GetMapping
import org.springframework.web.bind.annotation.RequestMapping
import org.springframework.web.bind.annotation.RestController

@RestController
@RequestMapping("/api-test")
class SampleApi(private val sampleService: SampleService) {
    @GetMapping("/log")
    fun sampleLog(): String {
        return sampleService.getSampleLog()
    }
}
SampleService 코드
package com.moduu.service.sample

import org.springframework.stereotype.Service

@Service
class SampleService() {
    fun getSampleLog(): String {
        return "Sample Api Log"
    }
}
3. 실행
스프링부트를 실행하고 localhost:8080/api-test/log에 접속해봅니다.
아직 스프링시큐리티 설정을 하지 않아서 로그인을 하라는 화면이 나올 겁니다.

ID는 user, PW는 스프링부트 로그 메시지를 참고해서 넣습니다

로그인이 잘 되면 아래와 같이 서비스 코드에 작성했던 문자가 화면에 나오는 것을 확인할 수 있습니다.

'Project > SpringBoot + Kotlin Backend' 카테고리의 다른 글
| [Spring Boot Rest API 만들기] 1. Spring Boot 시작하기 (feat. Kotlin) (0) | 2021.08.04 |
|---|